0

Oreo cupcakes

oreo-cupcakeRecently, I’ve been baking a weekly batch of cupcakes to share with a charity I’m volunteering at. Every Friday we sit down together to enjoy a home-cooked lunch, finished off with a freshly baked cupcake. This week, I arrived with a batch of Oreo cupcakes – a chocolate sponge, topped with a mound of sweet Oreo buttercream and a whole Oreo cookie, plus there’s a sneaky Oreo surprise in the bottom too! I’d underestimated quite how popular this little cookie is, and before long the cakes were mere crumbs on a serving plate…

You will need

(for the cupcakes)
175g Stork
175g caster sugar
3 large eggs (beaten)
175g self raising flour
1tsp baking powder
60g cocoa powder
1tbsp golden syrup
12 Oreos

(for the buttercream/decoration)
250g unsalted butter
250g icing sugar
1 packet Oreos
12 whole Oreos

Method
Preheat the oven to 180C and line a 12-hole cupcake tin with cake cases. Place a whole Oreo in the bottom of each case.

Cream together the Stork and caster sugar until creamy and paler in colour. Mix in a little of the beaten eggs, then a little of the flour (mixed with the baking powder), and repeat until all of the flour and eggs are added. Mix the cocoa powder with enough hot water to make a thick paste, and add it to the batter with the golden syrup. Mix until fully combined. Spoon the mixture into the cake cases – I prefer to use an ice-cream scoop to ensure uniformity – and bake for 25-30mins, or until they are springy to touch and a inserted skewer comes out clean.

While the cupcakes are cooling, make the buttercream. Cube the butter and beat until it is creamy and a lot whiter in colour. Add the icing sugar a little at a time and beat until fully combined. In a food processor, blitz a packet of Oreos into fine crumbs, then add these to the butter and icing sugar mixture. Mix well to make Oreo buttercream.

When the cupcakes have cooled, heap a mound of Oreo buttercream on top of each cupcake using an ice-cream scoop. Finish with a whole Oreo for decoration

0

Super chocolaty Easter drip cake

easter-drip-cakeFor me, Easter is all about celebrating new beginnings, spending time with family and friends and enjoying copious amounts of delicious chocolate. This Easter weekend will be no different, and I decided to bake a cake for the occasion. This Easter drip cake is a true showstopper. Baked in the Wilton’s layer cake pans I used one 3 egg cake recipe to create towering layers of chocolate sponge, chocolate buttercream, dark chocolate drips and an array of brightly coloured chocolate eggs…

You will need
(for the cake)
175g Stork
175g dark brown sugar
3 large eggs
175g self-raising flour
1tsp baking powder
60g cocoa powder
1tbsp treacle
(for the buttercream)
250g unsalted butter
250g icing sugar
200g milk chocolate
(for the decoration)
100g dark chocolate
chocolate eggs

Method
Preheat the oven to 180C and cover your cake pans with cake release. Beat together the Stork and sugar until the mixture is creamy and paler in colour – the longer that you beat the mixture at this stage, the lighter your cake will be. In a jug, beat together your eggs and leave to one side. Weigh out the flour and baking powder and mix together in a separate bowl. Gradually add the eggs and flour to your butter and sugar mixture, mixing well after each addition. Mix the cocoa powder with a little hot water to create a thick paste and add this to the mixture along with the treacle. Mix until fully combined. Spoon the mixture into the prepared tins and bake for 20-25 minutes, then remove from the oven and leave to cool.

For the buttercream, cube the butter and beat it for at least ten minutes until creamy and whiter in colour. Add the icing sugar a little at a time until fully incorporated. Melt the milk chocolate in the microwave, or in a bowl over a saucepan of boiling water, and mix it into the buttercream. Once the sponges are cool, use a little of the buttercream to sandwich them together,then use a palette knife to spread a thin layer of buttercream over the cake to seal in the crumbs. Put the cake in the fridge for 15 minutes to allow the crumb coat to set. Use a palette knife to spread a thicker layer of buttercream over the cake smoothing it as you go to create an even finish, then return the cake to the fridge for it to harden up slightly.

While the cake is in the fridge, melt the dark chocolate in the microwave, or in a bowl over a saucepan of boiling water, then remove it from the heat and allow to cool and thicken slightly. Take the cake out of the fridge and pour the melted dark chocolate over the top of the cake. Use a spoon to tease the chocolate over the sides of the cake until drips form. Return to the fridge for five minutes to help the chocolate set.

Spoon any leftover buttercream into a piping bag and pipe a design onto the top of the cake, then decorate with chocolate eggs and other chocolate shapes.

4

Banoffee cupcakes

banoffee-cupcakes I love browsing food blogs and Instagram, flicking through magazines and recipe books to get inspiration for new bakes. The idea of turning popular desserts into cupcakes is something that really appeals to me – deciding which flavour to add to the sponge and which to save for the buttercream and the topping, so that a single bite evokes the flavour combination and memory of a favourite dessert. This weekend, I created a cupcake from a much-loved British dessert – the Banoffee Pie…

You will need
175g butter/margarine (for the sponge)
175g golden caster sugar
3 eggs (beaten)
175g self raising flour
1tsp baking powder
2 mashed bananas
397g tinned caramel
280g butter/margarine (for the buttercream)
280g icing sugar
200g white chocolate
banana foam sweets
fudge pieces
grated milk chocolate

Method
Preheat the oven to 175C and line a twelve-hole muffin tin with cake cases. Cream together the butter and the sugar, then gradually whisk in the beaten eggs. Mix in the flour, baking powder and mashed banana, until well combined, then spoon into the cake cases. Bake for approximately twenty minutes, or until an inserted skewer comes out clean. Using a cupcake corer or a teaspoon, remove a piece of sponge from the centre of each cupcake and fill with caramel. Leave to cool.

To make the buttercream, cream together the remaining butter and icing sugar, then melt the white chocolate and combine. Spoon into a piping bag and pipe white chocolate buttercream on the top of each cooled cupcake. Decorate with a swirl of caramel, a banana sweet, some fudge pieces and a sprinkle of grated chocolate.

2

Chocolate orange cupcakes

chocolate-orange-cupcakesWhen I hear the phrase Cake Sale I get excited. I love having an excuse to bake something special without feeling like I have to eat it afterwards! After working hard in the kitchen on a new recipe, there is nothing better than seeing other people enjoy the fruits of your labour – especially if it means raising some money for a good cause too. Recently, my work-place held a Cake Sale for Barnardo’s and I took along a batch of Mary Berry’s double chocolate cookies, and these chocolate orange cupcakes…

You will need
175g butter/margarine (for the sponge)
175g dark brown sugar
3 eggs (beaten)
175g self raising flour
1tsp baking powder
50g cocoa powder (for the sponge)
1tbsp treacle
2tsp orange extract
200g butter/margarine (for the buttercream)
250g icing sugar
50g cocoa powder (for the buttercream)
100g orange fondant
star plunger cutter
piping bag and Wilton 1M nozzle

Method
Preheat the oven to 175C and line a twelve-hole muffin tin with cake cases. Cream together the butter and sugar, then gradually mix in the beaten eggs. Add the flour and baking powder and mix well. Weigh the cocoa powder into a mug, and pour hot water over the powder until just covered, then mix to form a cocoa paste. Add the cocoa paste to the mixture along with the treacle and orange extract, and mix until fully combined. Spoon the mixture into the cake cases, and bake for approximately twenty minutes, or until an inserted skewer comes out clean. Leave to cool.

For the buttercream, combine the remaining butter, icing sugar and cocoa powder and whisk until thick and creamy. Spoon into a piping bag with a Wilton 1M tip, and pipe swirls of buttercream onto the cooled cupcakes. Decorate with stars cut from the orange fondant with a star plunger cutter.

0

Giant birthday cupcake

giant-blossom-birthday-cupcake-for-girlsThere’s nothing I like more than designing someone a bespoke birthday cake. It’s a fabulous excuse to get creative and produce something really personal and unique. I look forward to the birthdays of my friends and family, knowing that I will get the chance to bring out my baking and decorating equipment and make something special. This giant cupcake was made for my good friend Emma who recently celebrated her birthday. It is a relatively quick bake that can be easily personalised…

You will need
230g butter/margarine (for the sponge)
230g caster sugar
4 eggs (beaten)
230g self raising flour
1.5tsp vanilla essence
1.5tsp baking powder
giant cupcake tin
cake release spray
150g butter/margarine (for the buttercream)
250g icing sugar
jam
8 inch round cake drum
1kg white fondant
Wilton gel colours
letter cutters
star cutter
butterfly cutter
edible lustre dust
small blossom cutter

Method
Preheat the oven to 160C and spray the giant cupcake tin with cake release spray, then leave to one side.

Cream together the butter and sugar, then gradually mix in the beaten eggs. Add in the flour, baking powder and vanilla essence, and spoon the batter into the giant cupcake tin. Bake for approximately one hour, or until an inserted skewer comes out clean. While the cake is cooling, make the buttercream by beating together the remaining butter with the icing sugar until thick and creamy.

Stick the base of the giant cupcake to the 8in cake drum using a small amount of the buttercream. Cover the base of the cupcake in a thin layer of buttercream. Colour 200g of the fondant green, and roll out to approximately 4mm thick. Using a sharp knife, cut the green fondant into strips, and stick it around the base of the giant cupcake, until it is covered all the way round.

Roll out a small piece of fondant coloured pink and cut it into a rectangle. Use the letter cutters to emboss the name of the recipient onto the rectangle, and sprinkle with some edible lustre dust. Stick the named plaque to front of the cupcake base using a little water. Cut stars from the remainder of the pink fondant and arrange around the base of the cupcake.

Use a layer of jam and buttercream to stick the top half of the giant cupcake to the base, then cover the top half with a thin layer of buttercream. Colour chunks of fondant different shades of pink and purple, and use the small blossom cutter to cut flowers fro the fondant, then push them onto the to half of the cupcake, using the buttercream PSX_20150424_105007as an adhesive. Repeat until the top of the cupcake is covered in fondant blossom.

Use the butterfly cutter to cut a butterfly from a piece of fondant. Decorate with some edible lustre dust and stick to the top of the cake with a little water. Then top with birthday candles and get ready to sing!

2

Raspberry ripple ice-cream cupcakes

raspberry-ripple-ice-cream-cupcakesWith the sun finally shining in London over the last couple of weeks, I was invited to my first barbecue of the year, and wanted to take along a sweet treat. I decided to bake some raspberry ripple ice-cream cupcakes for two reasons… One – they are delicious! And two – they really have the wow-factor! I love the surprise on people’s faces when they see me arrive with a tray of ice-cream cones, only to realise it’s all made from cake! This recipe can be adapted to mimic any of your favourite ice-cream flavours, but this is my personal favourite…

You will need
twelve ice-cream cup cones
175g butter/margarine (for the sponge)
175g caster sugar
3 eggs (beaten)
175g self raising flour
1tsp baking powder
1tsp vanilla essence
fresh raspberries
150g butter/margarine (for the buttercream)
250g icing sugar
raspberry sauce
chocolate flakes
foil
piping bag and Wilton 1M nozzle
a twelve-hole muffin tin

MethodPSX_20150424_110230
Preheat the oven to 180C. Cover the muffin tin with a layer of foil, and push an ice-cream cone through the foil into each space – you may need to use a knife to ease the cones through the foil.

Cream together the butter and caster sugar, then gradually mix in the beaten eggs. Add the flour, baking powPSX_20150424_110118der and vanilla essence and stir until mixed thoroughly. Spoon the cake batter into the ice-cream cones until they are about two thirds full, then push two fresh raspberries into the cones with your fingers until covered by the cake batter. Bake for approximately 25 minutes, or until the sponge has risen and an inserted skewer comes out clean.

Leave the cakes to cool, and make the buttercream by beating together the remaPSX_20150424_105326ining butter and icing sugar until thick and creamy. Once the cupcakes have cooled, spoon the buttercream into the piping bag and pipe swirls of buttercream onto the cupcakes. Finish with a drizzle of raspberry sauce and a flake.

If necessary, firm the buttercream up by placing the completed cupcakes in the fridge for an hour or two.

3

Sewing and knitting themed cupcake toppers

cupcakes-rgb
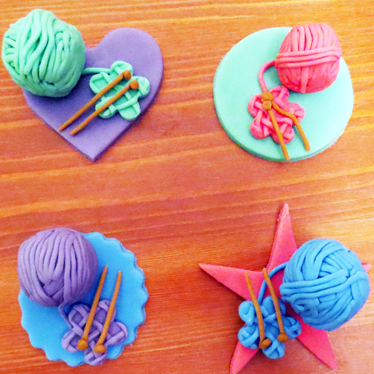
My good friend and fellow blogger Mrs Bennett is celebrating her birthday today. Like me, she is baker and craft lover and I wanted to create something extra special as a birthday surprise. These sewing and knitting themed cupcake toppers are bright, colourful, and very straight forward to create, plus they make a fabulous gift when boxed up. The toppers can be made in any size to fit cupcakes, miniature cupcakes, or used together to decorate a full-size cake.

You will need
500g white fondant
150g petal/florist paste
Wilton gel colours
cocktail sticks
a garlic press
edible glue and paintbrush
silcone button mould
a range of large cutters
rolling pin
fondant tools

Method
buttons-topper-rgbTo make the button toppers, use the large cutters to cut out four shapes, in different colours, from fondant rolled to about 5mm thick. I used the purple, green, blue and pink Wilton gel colours and a heart, circle, fluted circle and star cutter to make mine. Put to one side. Split the petal/florist paste into four equal parts, and using the gels, colour each part to a paler shade of the buttons-mould-rgbfour original colours. Wrap three of the coloured balls of petal/florist paste in cling film, as only one is needed at a time. Press small amounts of the coloured paste into the silicone button mould, taking extra care to push it into the whole space. Using a palette knife, or a finger, take off the excess so the paste is flat to the surface and all the button spaces are filled. Put the filled mould into the freezer for fifteen minutes, until the paste has harden in the mould. Finally, gently bend the mould to release the buttons. Repeat the process with the other three colours of paste. Using some edible glue and a clean paintbrush, arrange the buttons on top of the four large shapes. Use to decorate cupcakes topped with buttercream.

thread-toppers-rgb

To make the thread toppers, use the large cutters to cut out four shapes, in different colours, from fondant rolled to about 5mm thick. I used the purple, green, blue and pink Wilton gel colours and a heart, circle, fluted circle and star cutter to make mine. Put to one side. Roll a piece of coloured fondant into a cylinder, about a centimeter in diameter, then pgarlic-press-rgbress the remaining fondant through a clean garlic press to create thin strands of coloured fondant. Using the edible glue and a clean paintbrush, lay the strands across the cylinder to create the ‘thread’ on the cotton reel. Repeat until you have a cotton reel in all four colours. Using red, blue and yellow gel, create some brown fondant. Roll eight pieces of brown fondant into balls and flatten with your palm to create eight discs. Use a small ball tool to make a hole in the centre of each disc, and using the edible glue, attach a disc to the each end of the cylinders. Glue the assembled cotton reels and spare buttons onto the four large shapes. Use to decorate cupcakes topped with buttercream

wool-toppers-rgbTo make the wool toppers, use the large cutters to cut out four shapes, in different colours, from fondant rolled to about 5mm thick. I used the purple, green, blue and pink Wilton gel colours and a heart, circle, fluted circle and star cutter to make mine. Put to one side. Roll a piece of coloured fondant into a ball, about 1.5cm in diameter. Create thin strands of fondant using the garlic press and stick them onto the ball of fondant using the edible glue, to produce balls of  ‘wool’. Push some brown fondant through the garlic press to create eight thin brown strands for the knitting needles. Roll out a piece of coloured fondant and lay thin strands of fondant (in the same colour) on top in a woven crisscross pattern. Use a rounded blossom colour to cut out a ‘woven’ shape. Repeat these processes until you have four balls of wool, four woven flower shapes, and eight knitting needles in different colours. Arrange on top of the large fondant shapes, and place on top of a cupcake topped with buttercream.

boxed-cupcakes-rgb

Arrange the finished cupcakes in a cupcake or gift box, and present as a gift to a craft-loving friend, or enjoy at home with a cup of tea.
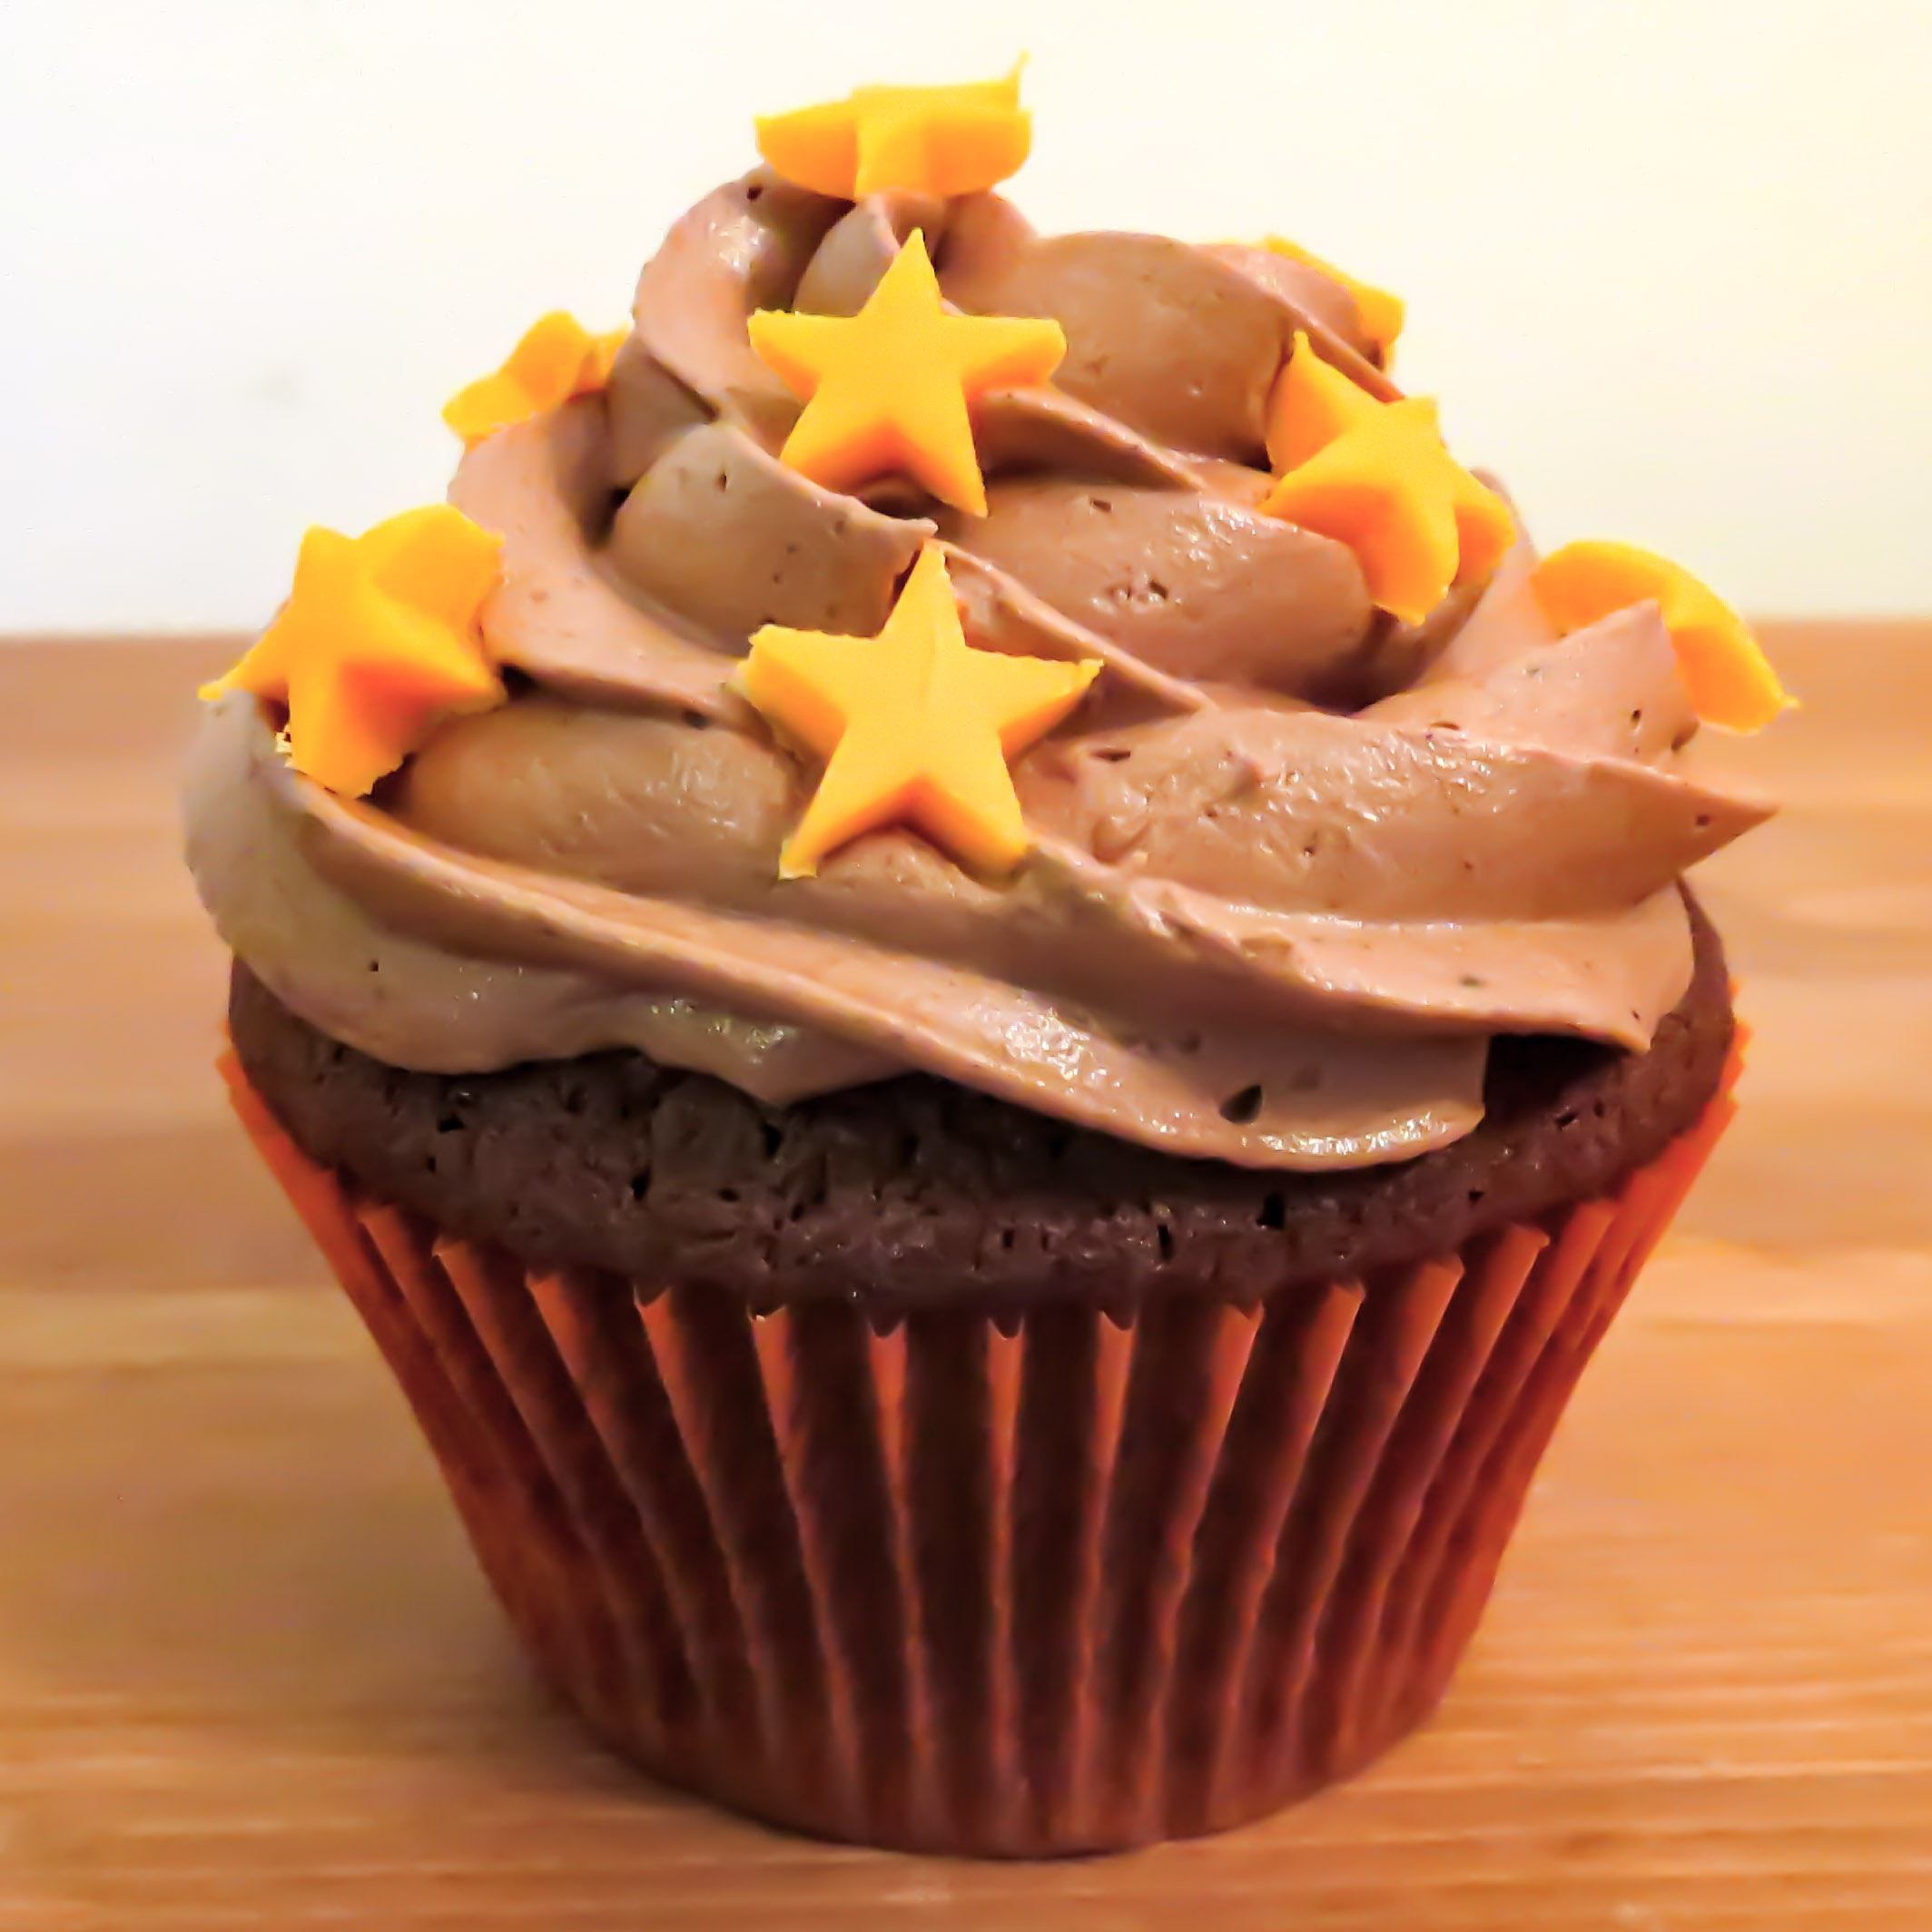
6

Miniature Valentine’s cupcakes: chocolate and raspberry

 valentines-cupcakes-rgbI love creating themed bakes for special occasions. Valentine’s Day is exciting, as it is the first big holiday of a new year, bringing with it varying shades of pink and red, chocolates, flowers, and – more importantly – an extra excuse to spoil your loved ones. Mr Stanton and I never go all out when it comes to Valentine’s Day. In fact, we are more likely to be found surrounded by pens and paper making a card or getting the glue out to create a more sentimental gift. These cupcakes are simple to make and not too naughty to eat.

You will need
55g butter/margarine
55g dark muscovado sugar
1 large egg, beaten
55g self raising flour
1/2tsp baking powder
1tsp black treacle
25g cocoa powder
1tsp milk
100g butter/margarine
150g icing sugar
one tube of freeze-dried raspberry pieces
miniature cupcake cases
fondant
Wilton’s gel colours
cutters/rolling pin/etc

Method
Preheat the oven to 170C and line a miniature cupcake tin with twelve cases. Cream together the butter and sugar, then beat in the egg. Fold in the flour and baking powder, then add the treacle, cocoa powder and milk. When the ingredients are well combined, spoon into the cases and bake for 20mins, or until an inserted skewer comes out clean.

For the buttercream, whisk together the larger amount of butter with the icing sugar and freeze-dried raspberry pieces, and add some pink gel colour to give a Valentine’s feel. Once the cupcakes are cooked and cooled, spread the buttercream liberally on top, and top with a Valentine’s sugarpaste topper (see below).

red-roses-cupcake-rgbTo make the red rose topper, cut out a circle of white sugarpaste and put to one side. Colour some sugarpaste red and roll it out to 2mm thick. Using a rounded flower blossom cutter, cut out a flower shape, the roll a small piece of red sugarpaste into a ball (about 2mm in diameter) and place it in the centre of the flower. Fold the petals of the flower up into the centre so that they overlap, formed a rose-head shape. For the leaves, use a daisy cutter to cut a flower out of green sugarpaste, then cut off the petals and use them as leaves. Arrange the leaves and roses on top of the white sugarpaste circle, and place onto a cupcake.

love-letter-cupcake-rgbTo make a love letter topper, cut out a circle of pale pink sugarpaste and leave to one side. Roll white sugarpaste to a thickness of 2mm, and using a sharp knife cut out a ‘house’ shape (a rectangle with a triangle on top). Fold the triangular ‘roof’ part over the rectangle to form an envelope. Use a small heart plunger cutter to cut a heart out of red sugarpaste, and use it to seal the envelope. Stick the envelope to the circle or pale pink sugarpaste and place the completed topper on top of a cupcake.

white-hearts-cupcake-rgbTo make the love hearts topper, cut out a circle of white icing and leave to one side. Using heart plunger cutters in various sizes, cut hearts out of pink sugarpaste and arrange them in the centre of the white sugarpaste circle. I thought three of decreasing sizes looked pretty, but feel free to experiment with colours and sizes. Arrange the completed topper on top of a cupcake.

pink-hearts-cupcake-rgbTo make the pink hearts topper, cut out a circle of pale pink sugarpaste and leave to one side. Using the small heart plunger cutter, cut ten hearts out of dark pink sugarpaste, then arrange in a heart shape on top of the pale pink circle. Using a medium heart plunger cutter, cut out one heart and put it in the centre of the smaller hearts. Place the topper on top of a cupcake.

1

Cherry Bakewell cupcakes

Cherry Bakewell cupcakes

Cherry Bakewells are a childhood-favourite of mine. It was a Saturday treat when I was growing up to bring a box of Mr Kipling’s home with the weekly shop and enjoy them after lunch. There’s something about the combination of flavours that is unrivalled… the sweetness of the fondant and the glace cherries, the sticky jam in the centre and then there’s the flavour of the almonds, something that greatly appeals to a marzipan fan like myself… I’ve taken these flavours as inspiration for a cupcake…

Ingredients
For the cakes
175g butter/margarine
175g caster sugar
3 large eggs
175 self raising flour
1tsp baking powder
3tsp almond essence
cherry/raspberry jam

For the buttercream
200g butter/margarine
300g icing sugar
pink food colouring

For the decorations
fondant
glace cherries
flaked almonds

Method
Preheat the oven to 180C and line a cupcake tin with cupcake cases. Using an electric whisk or mixer, cream together the butter and sugar. In a separate bowl, beat the eggs and add them slowly to the butter and sugar mixture, mixing between each addition. Mix in the flour, baking powder and almond essence and spoon into the cupcake cases. Bake for 25 minutes, or until golden and spongy to the touch.

While the cupcakes are baking and cooling, make the decorations. Roll out the fondant onto a flat surface dusted with icing sugar until it about 5mm thick. Cut the fondant into twelve rounds using a 4cm fluted cutter. Place a glace cherry in the centre of each fondant circle – the syrup will act as a natural glue. Arrange five flaked almonds around each cherry, using a little water to stick them to the fondant. Leave to one side.

For the buttercream, mix together the butter and icing with a few drops of pink food colouring. Spoon into a piping bag ready to decorate.

Once the cupcakes are cooled, scoop a little of the sponge out of the centre of each and fill the cupcake with a spoonful of jam. Pipe a swirl of buttercream on the top of the cupcake, and place a fondant decoration on top.